
Well, life has been crazy busy. My poor Olympus DSLR bit the dust last month. I replaced it with a Canon T3 which has been amazingly awesome. At the end of July, we moved to a new apartment.
I may be doing a post on cute decorating ideas I find around the internet since I'm going to be putting some time and energy into decorating our new place.
Like it but don't wanna make it?? Buy it HERE. (Please message me through Etsy if the item is sold out and you would like one).
As for now, a tutorial on how to make this necklace:

Materials:
- Three key pendants in different metal tones
- Four to five jump rings
- A small metal ring
- Approximately 20 to 26 inches of chain (depending on your preferred length)
- A clasp set
- A pair of chain nose pliers (two sets of pliers if possible but one will work too)


Step Three: Repeat with all other keys until all three are on the metal ring.
Step Four: Find the middle point in the chain and lay the chain out so that there is equal length on both sides and the middle forms a U. Pull middle through metal ring:

Step Five: Take the loose ends of the chain and pull them through the U. Make sure you pull them through so that there is still equal length on both sides. No lop sided necklaces! =)

It should look something like this:

Step Six: Attach Clasp. How you do this will depend on the clasp you choose. I had to use a jump ring to secure half of it. The actual clasp itself had a sort of built in jump ring that worked great. See below how I did mine:


The other part of the clasp, I attached with a jump ring. Just use instructions above on how to open and close jump rings to do that part.
And here it is with a clasp attached to it:

Okay, now go out wearing it and gather some compliments. Nothing feels better than people asking you where you got your necklace than when you can answer "I made it!"


Like it but don't wanna make it?? Buy it HERE. (Please message me through Etsy if the item is sold out and you would like one).
I may be doing a post on cute decorating ideas I find around the internet since I'm going to be putting some time and energy into decorating our new place.
Like it but don't wanna make it?? Buy it HERE. (Please message me through Etsy if the item is sold out and you would like one).
As for now, a tutorial on how to make this necklace:

Materials:
- Three key pendants in different metal tones
- Four to five jump rings
- A small metal ring
- Approximately 20 to 26 inches of chain (depending on your preferred length)
- A clasp set
- A pair of chain nose pliers (two sets of pliers if possible but one will work too)
Here are the keys I found. They came in a package at
Michael's like the one shown below.


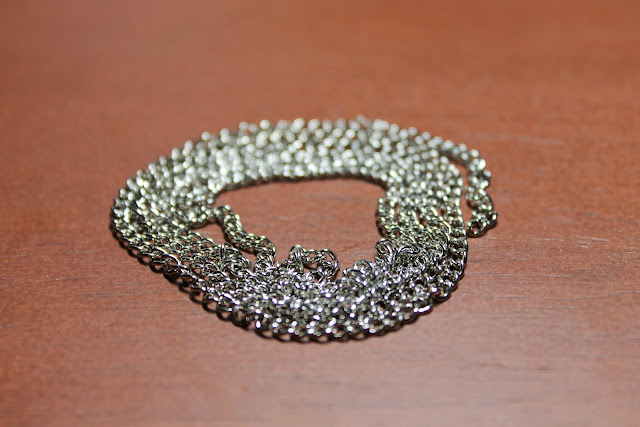
I used about 20 inches of chain for my necklace.
It was a medium thick chain:

Directions:
Step One: Open a jump ring using pliers. If you have two sets of pliers, look here. If you only have one, put the tip of the pliers into the center of the ring and open carefully. You only want to open them enough to allow the key and the metal ring to slip on to it.


Step Two: close jump ring around key and metal ring. If you have one set of pliers, just push the ring back together so the gap closes. If you have two pliers, refer to the link above.

Step Three: Repeat with all other keys until all three are on the metal ring.
Step Four: Find the middle point in the chain and lay the chain out so that there is equal length on both sides and the middle forms a U. Pull middle through metal ring:

Step Five: Take the loose ends of the chain and pull them through the U. Make sure you pull them through so that there is still equal length on both sides. No lop sided necklaces! =)

It should look something like this:

Step Six: Attach Clasp. How you do this will depend on the clasp you choose. I had to use a jump ring to secure half of it. The actual clasp itself had a sort of built in jump ring that worked great. See below how I did mine:

Opened with pliers:

And shut with pliers:

The other part of the clasp, I attached with a jump ring. Just use instructions above on how to open and close jump rings to do that part.
And here it is with a clasp attached to it:


I also made this one with slightly larger keys and a longer chain:

Like it but don't wanna make it?? Buy it HERE. (Please message me through Etsy if the item is sold out and you would like one).
I love this, but where do I get a metal ring like that to attach the keys to?
ReplyDeleteI found these at Michael's =)
ReplyDeleteThank you for penning down such an informative and meaningful piece of content so easily. I really loved and appreciate your deep insights on the topic. To provide you with more better and useful information, I would like to commend you Alteza. We are a prominent pharmacy app development company that provides mobile and web app development solutions for different pharma business owners
ReplyDeleteThis comment has been removed by the author.
ReplyDelete