Tuesday, September 4, 2012

Portobello Mushroom Burger Recipe

I've been doing my best to cut down on red meat. However, I love a good burger. I also love mushrooms. This recipe combines the best of both.

A good friend of mine, Suzanne Schneider, has an awesome cooking blog. This is one of her recipes.

I have provided the ingredients and directions with my personal changes. For the original recipe, please click here.


Portobello Mushroom Burger
2 Servings

Ingredients:
- 2 Large Portobello Mushroom Caps
- 1/4 Cup of balsamic vinegar
- 2 TBSP olive oil
- 1 tsp dried basil
- tsp dried oregano
- 1 TBSP minced garlic
- salt and pepper to taste
- 2 hamburger buns

Toppings (Pick the ones you'd like):
- Onions (I use thinly sliced red onion)
- Spinach, lettuce, or arugula (I use spinach or arugula)
- Tomatoes
- Cheese (I used provolone)
- Mustard, Ketchup, Mayo (I only use a little mayo)

Directions:


1. Place the mushroom caps, smooth side up, in a shallow dish. In a small bowl, whisk together vinegar, oil, basil, oregano, garlic, salt, and pepper. Pour over the mushrooms. Let stand at room temperature for 15-30 minutes, turning once halfway through. (I have also let these marinate all day in the fridge with great results).

2. Preheat grill or saute pan for medium-high heat (I haven't tried to grill these yet).

3. Brush grate with oil or spray pan with cooking spray. Place mushrooms on the grill/pan. If on grill, reserve marinade for basting. If in pan, add to pan with mushrooms. Grill for 5 to 8 minutes on each side, or until tender. Brush with marinade frequently. If in pan, cook 8-10 minutes on each side, or until tender throughout (cooking time will depend on thickness). Top with cheese during the last 2 minutes of grilling/cooking.

4. Warm up buns on grill or on stove and top with mushroom cap. Add desired toppings and enjoy. 

Grab some napkins! This one's juicy!


Saturday, August 4, 2012

DIY 3 Toned Key Necklace

Well, life has been crazy busy. My poor Olympus DSLR bit the dust last month. I replaced it with a Canon T3 which has been amazingly awesome. At the end of July, we moved to a new apartment.

I may be doing a post on cute decorating ideas I find around the internet since I'm going to be putting some time and energy into decorating our new place.

Like it but don't wanna make it?? Buy it HERE. (Please message me through Etsy if the item is sold out and you would like one).

As for now, a tutorial on how to make this necklace:


Materials:

- Three key pendants in different metal tones
- Four to five jump rings
- A small metal ring
- Approximately 20 to 26 inches of chain (depending on your preferred length)
- A clasp set
- A pair of chain nose pliers (two sets of pliers if possible but one will work too)


Here are the keys I found. They came in a package at 
Michael's like the one shown below.


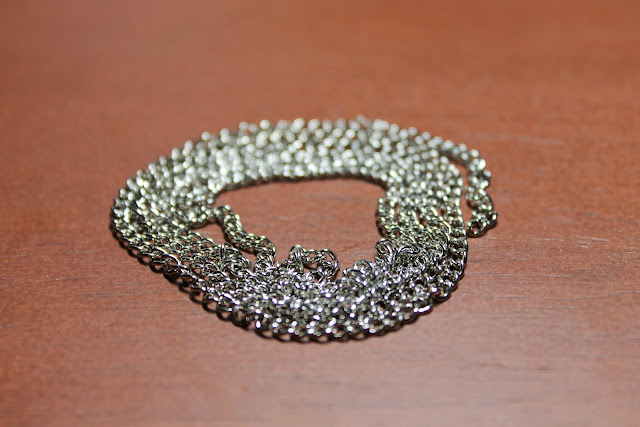
I used about 20 inches of chain for my necklace. 
It was a medium thick chain:


Directions:

Step One: Open a jump ring using pliers. If you have two sets of pliers, look here. If you only have one, put the tip of the pliers into the center of the ring and open carefully. You only want to open them enough to allow the key and the metal ring to slip on to it. 


Step Two: close jump ring around key and metal ring. If you have one set of pliers, just push the ring back together so the gap closes. If you have two pliers, refer to the link above.


Step Three: Repeat with all other keys until all three are on the metal ring.

Step Four: Find the middle point in the chain and lay the chain out so that there is equal length on both sides and the middle forms a U. Pull middle through metal ring:


Step Five: Take the loose ends of the chain and pull them through the U. Make sure you pull them through so that there is still equal length on both sides. No lop sided necklaces! =)


It should look something like this:


Step Six: Attach Clasp. How you do this will depend on the clasp you choose. I had to use a jump ring to secure half of it. The actual clasp itself had a sort of built in jump ring that worked great. See below how I did mine:


Opened with pliers:


And shut with pliers:


The other part of the clasp, I attached with a jump ring. Just use instructions above on how to open and close jump rings to do that part.

And here it is with a clasp attached to it:


Okay, now go out wearing it and gather some compliments. Nothing feels better than people asking you where you got your necklace than when you can answer "I made it!"


I also made this one with slightly larger keys and a longer chain:


 Like it but don't wanna make it?? Buy it HERE. (Please message me through Etsy if the item is sold out and you would like one).


Friday, June 8, 2012

Strawberry Cream-cheese Cupcakes

Sorry for the hiatus. I'M BACK!!! And with a bang too! Because these little cupcakes are by far the best I've ever made and just might be the best I've ever tasted. The best part is, they're easy!!!


I bought a mini cupcake maker off Groupon awhile back and decided to try it out. I have to say that I was pleasantly surprised. It cooks 7 mini cupcakes at a time but only takes 5-7 minutes a batch. It's great for warmer weather since it won't heat up the house.


Ingredients: 

- 1 box Betty Crocker SuperMoist yellow cake mix
- 2/3 cup water
- ½ cup sour cream
- 1/3 cup vegetable oil
- 2 eggs
- 3 tablespoons strawberry preserves (I used frozen strawberries thinly sliced instead)
- 1 package (3 oz) cream cheese, cut into 24 pieces
- 1 container Betty Crocker Rich & Creamy cream cheese frosting
- Sliced fresh small strawberries, if desired (for top)


1. Heat oven to 350°F (325°F for dark or nonstick pan). Place paper baking cup in each of 24 regular-size muffin cups. In large bowl, mix cake mix, water, sour cream, oil and eggs with spoon until well blended (batter will be thick). Divide batter evenly among muffin cups.


2. In small bowl, stir preserves until smooth. Place 1 piece of cream cheese on top of each cupcake; press into batter slightly. Spoon 1/4 measuring teaspoon preserves on top of cream cheese in each cupcake.

      3. Bake 20 to 25 minutes or until tops are golden brown and spring back when touched lightly in center (some preserves may show in tops of cupcakes). Cool 10 minutes in pans; remove from pans to cooling rack. Cool completely, about 30 minutes.

      4. Spread frosting over cupcakes. Just before serving, garnish each cupcake with strawberry slices. Store covered in refrigerator.


Directions for using cupcake maker:

If you are doing this with a cupcakes maker like mine, the process is considerably easier. Make the recipe as stated. Use cover each cup with cooking spray. Preheat device until ready. Pour the batter into each cupcake cup so that it is 2/3rds full. Lay a slice or two of strawberry (or a ¼ tsp of preserves) and a small square of cream cheese on top of each cupcake and push it in to the batter until no longer visible. Close cupcake maker and check back 5 minutes later (Mine took 6-7 minutes for each batch but I’ve heard that some will cook them in 5 minutes). Remove cupcakes carefully (I used two spoons on either side with light pressure to carefully remove each cupcake).

I made half the box and got 21 mini cupcakes out of it.


Source of original recipe: HERE

Thursday, April 5, 2012

DIY Tutorial: Chandelier Crystal Earrings


Love them but don't want to make them? Click here to buy them at my Etsy shop.


I have A LOT of jewelry supplies lying around. Since I am trying to save money, I'm going to go ahead and use the things I already have to do tutorials with. Jewelry tutorials are the easiest for me to make since I have been making jewelry for almost 10 years now. Plus, it's pretty AND you get to wear it while having the satisfaction of knowing you made it yourself (which is especially awesome when you get compliments on it!).

I wanted to do a pair of chandeliers for this post for a few reasons. The first is that it is not much more difficult than some of the other earrings I have done tutorials for on this site. (Check out: Christmas Tree Earrings to see what I mean). It's essentially the same thing really. It just takes longer and you have to repeat steps multiple times.

I chose to do my earrings with Swarovski crystal. Swarovski beads are pretty expensive though, so if you don't already have some on hand, you can use pretty much any bead as long as they will fit nicely in the frames you choose. You can also pick any frames you like. There are usually a few different types at craft stores.


Materials:

- A pair of chain nose pliers
- A pair of round nose pliers
- A pair of cutters
- 2 Chandelier frames
- Headpins (one for each loop on your chandelier frames)
- Beads (I used 4mm, 5mm, and 6mm Swarovski crystal but you can choose whatever you want as long as they are small enough to fit in the frames).
- 2 Earring wires


Directions:

Step 1: Place beads you want for the center of your chandelier on an headpin. Grab the end of the head pin (the end with no head) and bend it at the top of the beads. Be careful not to do it too aggressively, or the top crystal may crack. You will want to make sure that there is room for the headpin and the beads in the middle of your chandelier. If the headpin is too long, or the beads are too large, the piece will not dangle correctly.

Step 2: Next, take the round nose pliers and grab the head pin at the top of the beads. Make sure it is as close to the beads as possible without actually touching the top bead. Grab the end of the head pin and bend it around the looping pliers, pulling to make a round shape with the wire.


Step 3: Next, cut off the excess wire leaving some room to complete the rest of the loop.


Step 4: Finally, use the chain nose pliers to bend the wire into a complete loop. I find it easiest to push up at the same time as bending to make a nice even loop. This step can be difficult if you've never made jewelry before, so you may want to practice on some empty head pins before trying it. Okay, so now push the loop closed. This piece is finished.


Step 5: Repeat this process with all other dangling pieces. How many beads you put on which loop in the chandelier frames is entirely up to you. I decided to keep it simple and put two larger beads for the middle piece and one small bead on each bottom loop (see photos). You can be creative and put as many as you'd like for each loop. Just make sure they will dangle correctly and not get stuck when they hang. Attach pieces as you make them by opening the loop you made on the headpins and closing them around the loops on the chandelier frames using a pair of chain nose pliers.


Step 6: Once all your pieces are on the frames, open the earring wires and slip the frames onto them. Close them with the chain nose pliers.


You're done!


Love them but don't want to make them? Click here to buy them at my Etsy shop.

Wednesday, March 28, 2012

5 of My All Time Favorite Recipes


I know I haven't been posting much. Unfortunately, I've had to tighten my budget up and can't really spend money on materials or ingredients for blog posts right now.

Today, I decided to write a blog post about 5 recipes that I have made over and over again. They have become staples in our dinner menu rotation over the past 5 or so years. These are all from Allrecipes.com - one of my favorite recipe sites.

Links are provided as well as a description of each recipe and the things I have done differently than the original recipe's author.


This is one of those recipes that's so easy, you can throw it together in just a few minutes from stuff you might already have on hand. It makes flavorful, juicy chicken breasts with a nice crunchy exterior.

Tip: The only thing I do different for this recipe is to pound the breasts out so they are nice and thin. I'm not a big fan of a low crunchy outside to meaty inside ratio and pounding it thin solves the problem. If you are going to do this, you need to decrease the cooking time or it will overcook.


I absolutely hate the way Campbell's tomato soup tastes. It's sickeningly sweet and the texture is globulous and just all wrong. I use this recipe for my tomato soup needs and it's amazing. It tastes exactly the way tomato soup should taste. The pesto sets off the whole dish perfectly.
Tips: Make sure the soup is cool before blending it. This recipe once caused my blender to explode from the build up of heat within. I had burns up and down my arms. It wasn't good. Secondly, use the pesto to taste. The amount you need will largely depend on the brand you use so add it and taste it til it's perfect.


This recipe makes you look like you really know how to cook, even if you don't. It's elegant and super tasty. It has a nice lemony flavor that complements the fish perfectly and baking it in foil keeps all the moisture sealed in perfectly.

Tips: I substitute some of the butter for olive oil to make it healthier. I also top each fillet with very thinly sliced lemon with the rind still on it. The 1/8 inch slices add more flavor and make it look fancier. I also make sure to wrap each fillet in its own small foil pocket instead of putting them all in one together. Lastly, you can make rice to serve the fish over and dump the liquid from the bottom of the foil over it.


(sorry this pic is awful, hopefully I'll have a chance to make this soon and do a post on it)
I've used multiple types of fish for this recipe and have discovered that any type of mild fish will work. It's soooo yummy! I've always had it with sun-dried tomatoes, not sliced or canned. This recipe produces fish that eve fish haters are likely to enjoy. It's rich and flavorful yet is still low in calories.

Tips: watch your fish carefully when in the broiler! At least 6 inches from the flame is a must! I've never tried it with Roma tomatoes and I really don't want it any other way after having it with sun-dried tomatoes on it!


This is my fiance's favorite meal. When I first started making it, I thought the ingredients were a bit weird. Over time, I didn't care what was in it. It's yum!

Tip: This recipe can be used on other mild fish as well. You'll want it 6 inches from the heat source when broiling.